The Settings page allows you to configure the rules for automatically archiving WooCommerce orders. Follow the steps below to set up auto-archiving based on your store’s requirements.
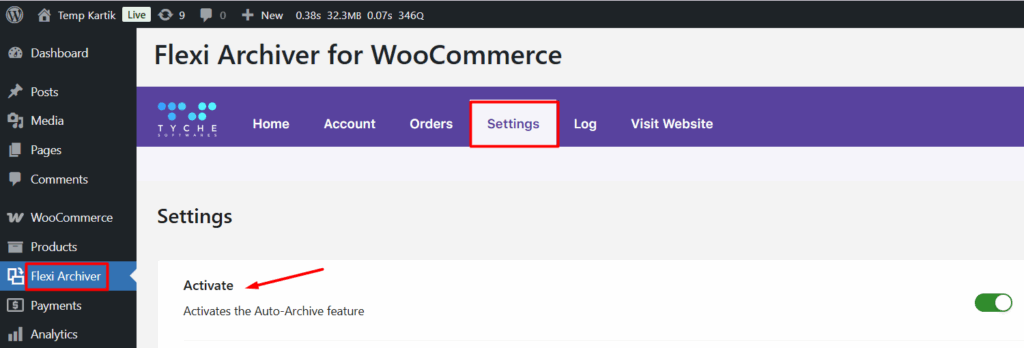
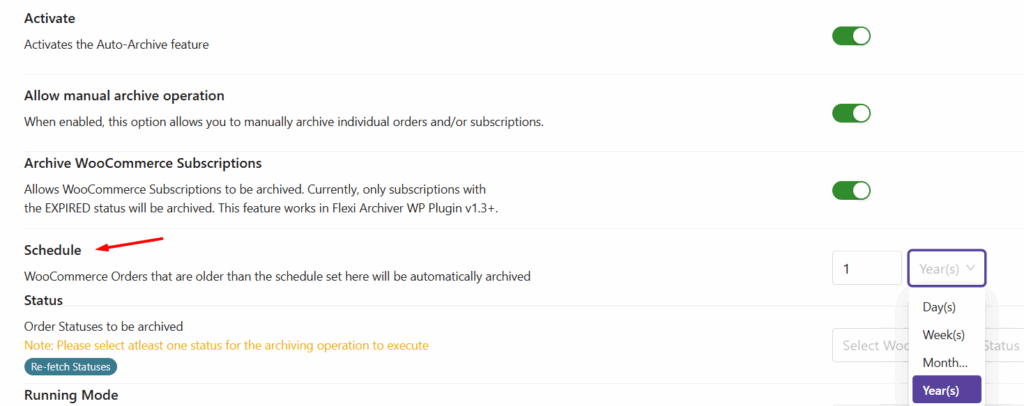
Activate the Auto-Archive Feature #
- Go to WooCommerce → Flexi Archiver → Settings.
- Enable the Activate option which will activate the Auto-Archive feature
This enables the Auto-Archive feature and allows Flexi Archiver to archive orders automatically based on the configured rules.
Allow Manual Archiving of Orders #
Enable Allow manual archive operation to manually archive orders or subscriptions from the WooCommerce admin.
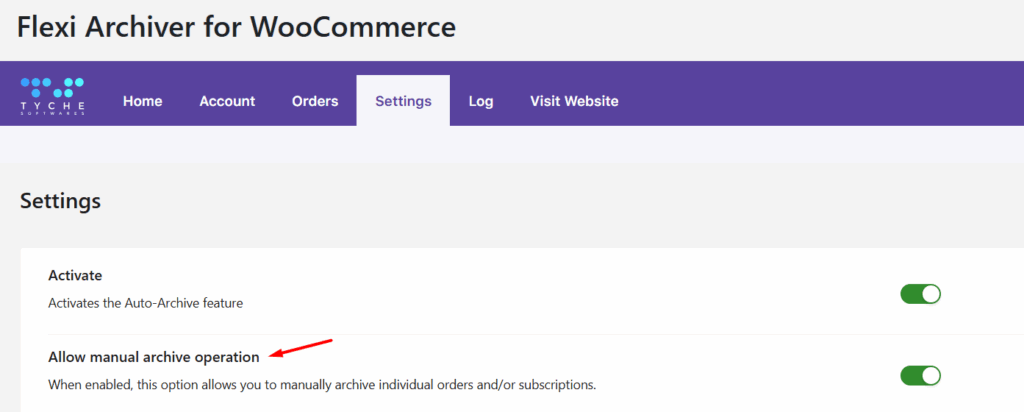
When this option is enabled:
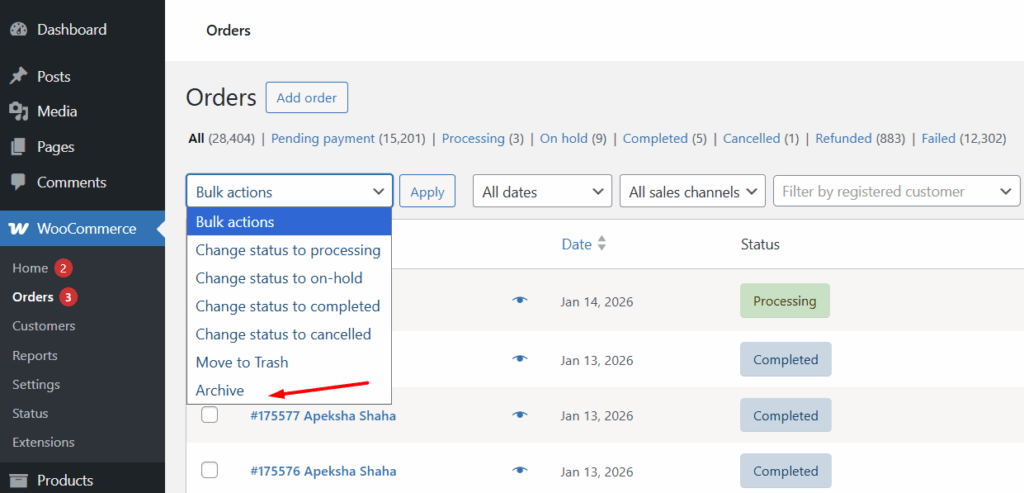
- An Archive option is added to the Bulk Actions dropdown on the WooCommerce Orders page.
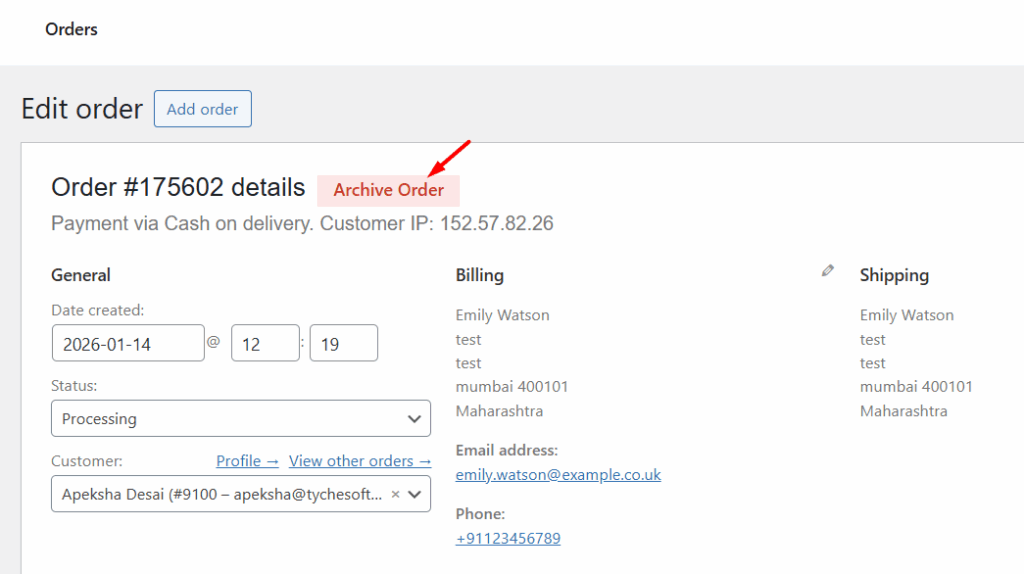
- An Archive button is added to the individual order’s Edit Order page.
This allows administrators to archive selected orders without waiting for the automatic archiving schedule.
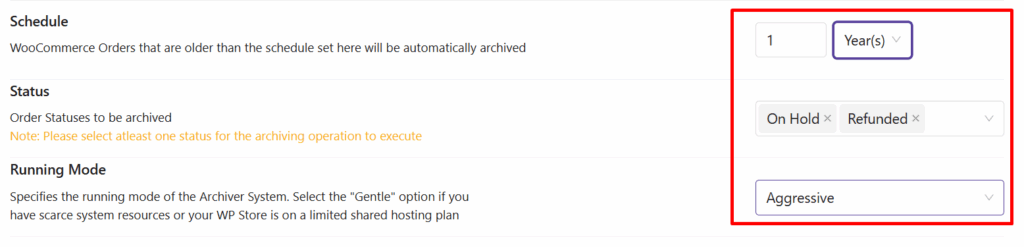
Schedule Auto-Archiving #
Use the Schedule setting to define how old an order must be before it is automatically archived.
Example:
If the schedule is set to 1 Year, orders older than one year will be archived automatically.
Select Order Statuses for Archiving #
Use the Status option to choose which order statuses should be included in the auto-archiving process.
- You can select default WooCommerce order statuses.
- Custom order statuses using the Custom Order Status plugin by Tyche Softwares.
Example:
Select On Hold and Refunded, or a custom status such as Ready for Shipment, to archive only orders with those statuses.
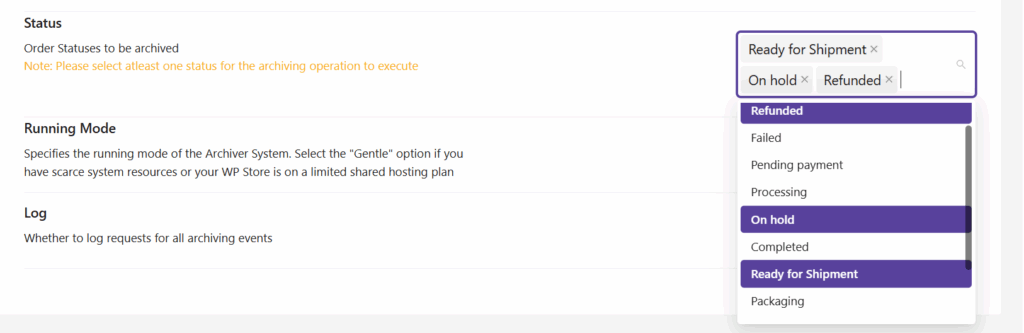
Note: At least one order status must be selected for the archiving process to run.
Choose the Archiving Running Mode #
Use the Running Mode option to control how the archiving process is executed.
- Gentle – Recommended for stores with limited server resources or shared hosting environments.
- Aggressive – Processes archiving tasks faster but may consume more server resources.
Select the mode that best matches your server capacity.
Enable Logging #
- Enable the Log option if you want to track all archiving activity for records or troubleshooting.
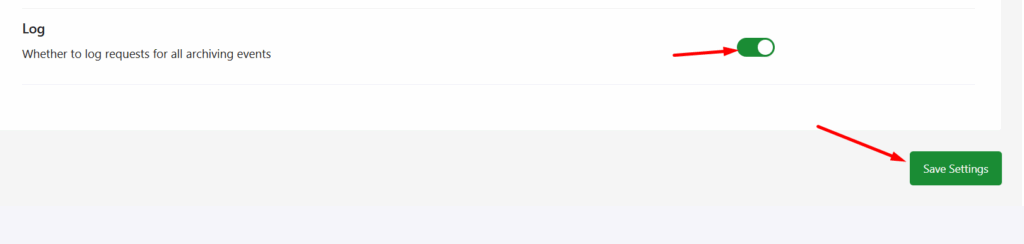
After configuring the options, click Save Settings to apply your changes.


